Saturday, December 31, 2011

New Year's Eve Countdown Balloons

Each year on New Year's Eve, we have a little party with our family at home.  There's no way I'd rather bring in the New Year than with my very favorite people in the whole world and we have fun planning some yummy food, activities to do, and seeing which kids will make it up until midnight.  On one of my daily scrolls through Pinterest, I found this idea for New Year's Countdown Balloons and thought the kids would really get a kick out of it.

I used a couple of the ideas from the blog post, but then came up with some of our own as well.  Here's our list of what we did;

1. Play a card game.
2. Put on a Glee CD and have a dance party!
3. Pick out a piece of candy.
4. Have a sword fight with Daddy.
5. Pick up main level...THEN...buy Fruit Ninja for Kinnect!
6. Have a thumb war.
7. Have a Popsicle AFTER you finish dinner.
8. Read a book in front of the fireplace.
9. Get in your coziest jammies.
10. Share some of your favorite memories from 2011.
11. Share some goals for 2012.
12. Toast with Kid Wine, then run outside with your noisemakers and yell "Happy New Year!"

I had the kids pick up their bedroom the morning of New Year's Eve and, while they were doing that, I blew up the balloons and hung them.


They noticed them immediately when they came down and were excited about seeing what kind of activity was in each one.  For the rest of the day, it was a constant countdown to the next hour.  The 3 year old asked every 5 minutes if it was time for another balloon yet.

Most of the activities were a hit!  Surprisingly, the 6 year old (not going to lie, I did type 5 at first, so not used to him being 6 yet!) was not happy with #8 but, after a couple of minutes of pouting on his own, decided to join us.

Surprisingly again, they were all excited about #9.  May have been because just before that they noticed it was FINALLY snowing and, with their dad, all went out for an impromptu snowball fight and came back in wet and freezing.  Cozy pj's probably sounded pretty darn good right about then.


~Happy New Year 2012~


The 9 year old said that he think this should do this every year and make it a tradition and the 6 year old has decided he wants me to do the same thing on his birthday next year too.  It was a great, fun, easy, cheap activity to do and everyone enjoyed it.  It will become an annual tradition at our house.

Friday, December 30, 2011

French Toast Souffle

Along with the Crock Pot Breakfast Casserole, I also found this French Toast Souffle to make.  It was an assemble-the-night-before dish, so again, perfect for not having to spend all morning in the kitchen cooking.  And when I saw cream cheese and french toast, well, I was sold.  Cream cheese just makes the world a better place.

My husband assembled this one while I was working on the egg bake and finishing up wrapping the presents.  I can't personally say how easy it was, but he did it with no questions and no complaining so I'm willing to bet it was pretty simple.

Popped this baby in the oven the next morning for about an hour and we were ready to enjoy!  This was a huge hit, everyone loved it!  It's rich and sweet with the maple syrup (we used 100% pure) and powdered sugar.  We'll be making this one in the future as well.  It's great for holidays, other special occasions, or guests.  Between the Crock Pot Breakfast Casserole and the French Toast Souffle, you have the perfect breakfast with very little time spent in the kitchen in the morning.  It's really just a matter of putting the souffle in the oven and then you can enjoy your time with your family.  Doesn't get any better than that!

I apologize again for the picture, we were already stuffing our faces with it before I remembered to take one.


Crock Pot Breakfast Casserole

Our family usually has the tradition of celebrating Christmas together on Christmas Eve.  We (my immediate family, dad, and brother) all get together and have fondue for dinner and then open our presents.  Since my brother got married a couple of years ago, this has had to evolve and change so that they can also incorporate their plans with her family.

This year, we did a Christmas Eve brunch for the first time.  Those of us who know us, know that we are not early risers in our family.  We're a late to sleep, late to rise kind of crew.  I wanted something to make that wouldn't involve me having to get up a few hours early to be in the kitchen so when I went through my Food board and saw this Crock Pot Breakfast Casserole pin, I knew it was just the thing!

We assembled it around midnight on Christmas Eve Eve (the kids got such a kick this year at wishing everyone a Merry Christmas Eve Eve Eve, then Eve Eve, and finally! Eve) and it was quick and easy.  We skipped the onions and peppers because of personal preference. We also used seasoned salt instead of dill because I didn't have any dill. The most time consuming part was cooking the bacon, the rest was pretty much tossing things into the crock pot.

The house smelled SO good when we woke up the next morning!  The casserole was really yummy and we'll be making it again, next time maybe as a Breakfast for Dinner dish.  This would be easily adaptable as well, adding different veggies, or other kinds of cheese or sausage instead of bacon....

Pardon my picture.  I had forgotten to take any until we already started digging in!


Friday, December 23, 2011

Christmas Crack

I know this recipe is nothing new but I've never made it myself, and actually, I've rarely been at gatherings where people have had it.  When I saw this Christmas Crack recipe circling Pinterest, I figured I'd try it with my Enjoy Life chocolate chips.

This was quick and easy to make and it is awesome!  I gave the 5 year old a taste while I was breaking up the pieces and he turned into a vulture, hovering over me, waiting for small broken pieces that he could snatch up.  He has declared it his new favorite Christmas treat!


Heating Packs


I have a rice heating pack that I bought for .10 at a garage sale about 10 years ago.  It has been the best .10 I've ever spent.  I use it almost every day for everything from headaches, to stomach aches, to sore muscles.  My kids have been wanting to use mine a lot lately, sometimes I think they just like snuggling up to something warm, so I added that to my list of homemade gifts for them this year.  I didn't have this pinned already so I just searched "rice heating pack" on Pinterest and this is one of the many tutorials I found.

I didn't follow the tutorial exactly, more to just get a general idea.  I picked out a special fabric for each boy; dragons for the 9 year old, pirates for the 5 year old, and sharks for the 3 year old. I used my current heating pack as a template, cut out the fabric, and since I don't know how to use my sewing machine I hand sewed them.  It didn't take too long at all, about an hour each one.

I had read in the comments (boy, you can really learn a lot reading the comments in tutorials, very helpful for hints before you start!) to rinse your rice first so your heating pack doesn't smell like a rice bowl the first few times you use it.  I then added about 15 drops of peppermint essential oil and about 15 drops of cinnamon essential oil to the rice and stirred it up, added it to the bags and stitched them close.  They smell SO yummy!  Like Christmas in a bag!

While this won't be a gifts the boys are jumping up and down over, I think they will end up being used a ton.  I'm going to make another one for myself since my trusty 10 year old friend has seen better days by now.  These are easy to make, even more so if you have sewing machine skills, and the tutorial linked above has a sweet little poem you can include with your heating pack, making it great for gift giving!


Thursday, December 22, 2011

Chocolate Pretzel Peanut Butter Balls

So when I said that I couldn't have chocolate in my last post, I lied just a bit.  I can have the Enjoy Life allergen free chocolate chips.  I just don't use them a lot for baking, more to keep on hand for a quick chocolate fix, as they're kind of spendy at around $5 a bag.  Found these amazing little Chocolate Pretzel Peanut Butter Balls on Pinterest and I figured I would splurge for a treat that we all could eat.  I substituted Glutino gluten free pretzels for regular pretzels so this was 3 year old safe too.  Not the cheapest treat between the chocolate chips and the Glutino pretzels but the end result was oh so worth it!

The trickiest part to these was rolling the peanut butter balls.  I did as the recipe says and chilled my fingers with cold water but that would only work for maybe one ball and then I'd have to re-chill.  As someone in the comments suggested, I then tried chilling the "dough" before rolling it.  I took advantage of the weather and just set the pan of them out on our front porch for about 45 minutes.  That helped, but it still was tricky.  I finally figured out that keeping my fingers wet after chilling them under the cold water was the trick to getting the balls to stick easily. (my husband would be giggling like a teenager reading this post.)

Aside from the little, minor problem of rolling the peanut butter balls, this was another easy recipe and these things are DELICIOUS!  So so so good!  The 3 year old LOVES them and I love that I've found another gluten free, safe Christmas treat for everyone to enjoy.  The biggest problem with these will be having them last until Christmas, even if it is only a couple of days away!


Even though he's already had a couple, when the 3 year old just saw me upload this picture he said, "Can I have one of those?"  A hit!  And now the 5 year old is alerting me that the 3 year old is "stealing the chocolates" so that's my cue. : )

Two Ingredient Peanut Butter Fudge

I'm always on the lookout for new Christmas goodies that everyone in the family can eat.  The 3 year old is gluten free and I have a ton of food sensitivities myself and can't have chocolate (I know, life is so unfair!) so sometimes it can be a challenge.  I'm also not a big baker and don't have the patience for recipes that involve a lot of steps or require a lot of time in the kitchen.  When I saw the Peanut Butter Fudge recipe, that only used two ingredients, I knew I had to try it!

One of my crazy OCD tendencies adorable little quirks is food safety.  I wanted to know where these should be stored and how long and the original blog pin didn't give me that info so I went searching for it (love you Google) and found another website with the same recipe that told me what I needed to know (up to a week in the fridge if you're anything like me and have to know) and in the comments of that recipe post, a few people suggested adding a cup of powdered sugar to give it more of a fudge consistency so that's what I did.


Um....yum.  Seriously, this was so good and rich and the closest thing to my beloved fudge I've had since not being able to eat chocolate.  It literally took me under 5 minutes to make, then just needed to chill.  Beyond easy peasy.  We will definitely be doing this one again! Oh, and the kids loved it too!

Wednesday, December 21, 2011

Ice Cream Snowmen


Tonight I made these cute ice cream snowmen  for a surprise dessert for the kids.

We didn't use the licorice since my gluten free baby can't have it and I didn't have any cherries for the hat but I made do.  As you're probably learning from some (okay, all) of my food posts, presentation isn't my strong suit.  In my defense, it's harder than you might think to get chocolate chips to stick in a marshmallow.  Hence, the smashed in, mauled appearance on the snowman's face.  Poor guy.  I don't really have any excuse for the not perfectly shaped ice cream scoop bodies.  I'll blame my scoop.  Be sure to check out the link to see how cute they really can be.  You know, if you're into that whole presentation thing.

The kids loved them though!  The 9 year old exclaimed, "Oh, they're so cute!", the 3 year old said, "Mama, look!  I eat my snowman!  He melted!" and the 5 year old thinks we should do them every year at Christmas time.  I'm sure this one will be a repeat.

Tuesday, December 20, 2011

Recycled T-Shirt Scarves


While I was having a fairly easy time coming up with homemade gifts for the three boys, it was a little tougher for the 20 year old.  Then I came across these recycled t-shirt scarves and thought they'd be perfect! For the full tutorial, please visit the link.  I already had a pile of t-shirts that I had bought a few months ago in hopes of doing a different pattern of scarves.  I picked mine up for $1.99 on sale at Menard's but you could use any unwanted t-shirt in your closet or find some at a thrift store.


                                                   I set out my shirt and got to work cutting.

When I finished, it looked quite a bit different from the scarf in the tutorial and I realized that I pulled the t-shirt strips tighter than I should have to get that ruffly kind of look.  Another scarf tutorial had said to stretch the strips so that they curl in on each other, so that's what I did.  It still ended up pretty cool.  This will be the 20 year old's Christmas gift.


I wanted to try again, however, to get more of the look in the original blog so I grabbed another t-shirt from my pile and got to work cutting again.  This time I barely pulled on my shirt strips at all before wrapping them around my hand.  They curled in a bit, but not much, and I think it looks a lot more similar to the tutorial scarf.  I also tied this one into a circle for a looped scarf.


It's a bit long so I may end up cutting off a loop or two but, all in all, I like it!  This is a super quick, cheap, and EASY project!  From start to finish, for both scarves, it only took me an hour.  You could easily whip one of these babies out in 20-30 minutes.

Monday, December 19, 2011

Peg Dolls

Another idea that I found on Pinterest for a homemade Christmas gift for my boys were these adorable peg dolls!  There were Harry Potter ones for the 9 year old, Super Hero's for the 3 year old, and I searched out these Super Mario ones for the 5 year old.

There were no tutorials for these designs, although if you Google "peg dolls" you can find basic tutorials for tons of other ones, and it was through one of those sites that I found the website to order the wooden peg people.  You can also find them at craft stores sometimes, although the Joann's in my area only had the dress shaped ones.  I bought the 2 3/8" tall ones from the linked business.  They were only .25 each, the most costly thing was shipping which was around $6 but, still, under $10 for gifts for all three boys ain't too shabby!


It took me about 4-5 hours total to finish all 12 of these people.  I just pulled up the pictures of the designs I wanted to do and did my best to get it at least close.  I'm no artist, that's for sure.


I haven't been able to give reviews on how my kids have liked everything I've tried, like the Harry Potter wands, as they're for Christmas gifts but I can give at least a tiny review on these guys.  The 3 year old has seen my pinned pictures of the peg dolls and every time he sees the super hero ones, he shouts "I want those Mommy!"  Well, after I finished painting the dolls yesterday, I had put them on a dresser in my closet to finish drying completely and forgot they were there.  He was with me while I was putting away laundry this morning and, all of the sudden, his eyes got big and he exclaimed "Mommy!  It's those things I want!"  Oops.  I quickly ushered him out of the closet, closed the door and tried my best to distract him but he was none too happy.  Once I got him settled doing something else, I went back and hid the dolls.  He hadn't forgotten them, though, and a bit later came to me saying, "Those guys are missing!  I can't find the Batman and Robin, they're gone!"  I'm currently trying to convince him it was just his imagination and he never saw anything.  So far, he's not buying it.  But I'm guessing these will be a hit when he opens them on Christmas Eve!


Tuesday, December 13, 2011

Masking Tape Roads


I found this picture on Pinterest awhile back and thought it would be fun to try out today. I had the boys go around and collect their cars, trucks, and motorcycles earlier in the day and then laid out the masking tape roads all over the ground and some furniture.


The kids thought it was awesome to have roads everywhere! There were several mentions of "how cool" this was. The older two set up a couple of buildings and grabbed some action figures and had a police/robber scene going on for awhile, until a wild saber tooth tiger invaded the village and that became the new focus.


Notice my 3 year old pouting in the bottom left corner of the picture above. He was acting particularly "three'ish" today, that's the nicest way I can think of putting it, and was just a bundle of fun (heavy sarcasm) to deal with. He had fun for the first few minutes but then everything was "MINE!" or "NOT YOURS!" or just plain old "NO!!"

This activity was a lot of fun, and would have been more so, had my kids not all kind of been in moods today. I think the dreary weather is affecting all of us. It allowed me about 30 minutes of happy play (3 year old aside) until the older two started bickering over what each character should say or do, how the story line should go, etc. I finally threw in the towel, popped some popcorn, and put in a movie. Some days you just need to do that.

Monday, December 12, 2011

Measurement Christmas Trees

Today we made Measurement Christmas Trees for a school/craft activity. The original idea was on a Kindergarten blog and entailed having the kids order the green strips from largest to smallest. That was a perfect activity for the 3 year old, with a little help from me. I'd put two strips out and ask him "Which one is bigger?", let him choose, and help him glue them on.


The smallest to largest part was way easy for the 5 and 9 year olds so I took it a step beyond and had them actually measure their strips and write how many inches each one was on said strip. This was great measuring practice for the 5 year old and we also talked a bit about fractions when a measurement would come up as 1/2 or 1/4. It was nice reinforcement for the 9 year old, who has been studying fractions, as well.


Once that was done, the kids got to paint snowflakes on using Q-tips. They all had a lot of fun "dot, dot, dotting" their projects.


This was a fun and educational project, perfect for preschool through kindergarten, and even beyond!
(The 9 year old asked me to specify that his tree is the one on the far right.) : )

Sunday, December 11, 2011

Felted Christmas Wreath


This year I signed our family up for a Christmas ornament exchange through a homeschool group I'm on. We needed to make 6 homemade ornaments to send to 6 different families, and in turn, we'll get 6 different homemade ornaments back.

After looking through Pinterest for ideas, we settled on this felted Christmas wreath . I already had white, green, and black sweaters that I had felted last year for a project that I never ended up doing and a red sweater that I also bought at the Goodwill last year but never got around to felting. I picked up one more teal colored sweater at the Salvation Army for about $2 and we were set!

The most time consuming part of this project was the felting, although that's a lot of hands off time, just needs to run through the washer and dryer once or twice, and the cutting out of all the pieces. We needed 6 ornaments for the exchange, plus 1 for us and 2 for gifts so 9 altogether which ended up being more than 400 squares of felted wool. Each ornament takes 60 or so squares so if you were only making a couple, the amount of time cutting out squares would be cut (no pun intended, hehe) way down.

I did all the felting and cutting on my own but called the family together to make the actual ornaments. We turned off the tv and video games, turned on some Christmas music and the tree lights and all gathered in the family room. It was a simple enough project for even the 5 year old to easily grasp and have fun with. All of the kids said they enjoyed doing it and they had fun coming up with different patterns and color combinations. Even the hubby, who is incredibly anti-craft, seem to at least tolerate it which is as much as I can hope for!


It only took us a bit over an hour to make 9 wreaths and I think they turned out adorable! This was a fun craft for everyone to participate in and we would totally recommend it!


Christmas Tree Pizza


This dinner was intended for Friday, but that ended up being one of those days where life just got in the way. I took the boys to a Nerf gun battle their dad was hosting at the Boys and Girls Club and, on the way home, we stopped by the grocery store to get pepperoni for our pizza. We were only in there for about 15 minutes but when we came back out, the car was dead, dead, dead. We had a couple of friends coming over that night and, since dealing with the car took up an extra hour out of our night, we ended up just doing frozen pizza.

Christmas Tree Pizza was moved to Saturday night. I gave the job of shaping the dough into a Christmas tree shape to the hubby while I was shredding the cheese. I'll let you decide how good of a job he did. ; )

The kids thought this was a lot of fun, although the 5 year old first thought it was a fish pizza. Again, the hubby was the dough shaper . I'm sure we'll end up doing this, or some similar shape, every year. It's a quick, easy, fun way to bring a little Christmas spirit into dinner time!


Thursday, December 8, 2011

Ice Cream for Dinner!

Dad was gone at a work function tonight which meant a meal with the kids in mind. I decided to do breakfast for dinner, with this waffle ice cream cone for a fun spin on it. The original blogger actually made hers out of grilled cheese, but does say that waffles work great for a fun breakfast.

This was very quick and simple and the kids loved the fun of having "ice cream" for dinner. The 5 year old said it was the "best dinner ever", the 9 year old said, "Thanks for a delicious dinner Mom!" and the 20 year old said, "Did you get this off Pinterest? It's so cool!" (she doesn't know of my challenge but obviously knows where I get a lot of my creative ideas)

We rounded out dinner with some bacon and apples and 2nd's on waffles. The meal/recipe itself isn't very novel or different, but like they say, presentation is everything!

Balloon Ping Pong


I had 4 young boys in the house today so needed something to help them burn off some energy. We decided to give Balloon Ping Pong a try. I use the term "ping pong" very very lightly. There was actually no pinging or ponging involved.

It took me about 2 minutes to duct tape some Popsicle sticks to paper plates and blow up a couple of balloons and we were good to go.

Instead we made up different scenarios and played "Don't Let the Balloon Touch the Ground". First the ground was hot lava and we had to keep the balloon from touching it. Then we were in the sea and sharks and giant squids were trying to get our balloons and we had to save them. There was lots of running around and yelling involved. Shocking, with little boys, I know.

All in all a cheap, easy, quick activity to use up some pent up energy on a cold winter day!

Wednesday, December 7, 2011

Harry Potter Wands AKA Those Stupid Bleepity Bleeps

Warning! This post may be considered PG13 for language!


Okay, so I'm not big on swearing. I don't do it very often and I don't really care to hear it. But some things will drive me to say some colorful words and these Harry Potter wands were one of those things.

When I saw these on Pinterest, I knew I had to try them for my major Harry Potter fan children. We're doing a lot of homemade this Christmas and I thought this would be a perfect gift for all 4 of my kids. So tonight, while the hubby was putting the little ones to bed, I got out my hot glue gun and went to work.

Ooooh, boy. It didn't begin well. I couldn't get the glue to go much farther than an inch down the wand no matter what I did. In reading the comments on the original blog post, someone said they had a similar problem and solved it by rolling a pencil in the wand. I tried that. No go. After starting on my third attempt, and going on an hour of working on these, I was getting frustrated, and yes, some naughty words were sneaking out. I really didn't want to give up, though, as I knew my kids would just love the finished product. So out of desperation, I unrolled all of the third wand, up to where it was filled (about 1 inch of the bottom) and got the glue gun close to the dried glue and starting squeezing the heck out of that gun while whisper yelling "Fill dammit! Fill!" Huh! It was seeming to work!


That was the key, getting that first inch filled, letting it cool and harden, and then unrolling and filling and rolling as I went. I was happy I figured out a solution, but it still wasn't smooth sailing. For one, that glue it hot!! Even through a layer or two of paper, it can burn you. Trust me, I know. (and one or two small bad words may have escaped every time I touched that scalding paper) Two, anyone who's worked with hot glue knows of those hot glue strings you get. Mid-way through the first wand, I felt like I was covered in hundreds of spider webs-blech (of course, I wouldn't possibly think of uttering any more no-no's while trying to shake millions of little glue strands off of my hands, arms, clothes...). It also got a bit tedious filling, waiting for it to cool a bit, filling, waiting, filling, waiting, filling, waiting, and so on and and on. After I got that first one filled, the others went more quickly. That could also be because I had my husband helping to hold at that point so I'd fill, he'd hold while it cooled while I started filling a second one, we'd trade and we pretty much had a good system going on. He was also very helpful in suggesting I "stop burning myself" each time a damn or sh*t escaped my mouth.

Each wand took 10-13 mini glue sticks to fill and about 20-25 minutes. After my first couple of failed attempts, I also realized I was rolling the wands too loose. They should be fairly tight, with the narrow end about the size of a pencil, getting a bit wider at the other end.
That greeny yellow thing is an unsharpened pencil if you couldn't tell.


Here's how a finished, filled wand looks before painting;


The painting and making the designs when fairly quickly and I just did that as the directions on the original blog say.
I started this project around 9:00pm and, at 2:00am, I was finally finished! Well, not quite. I still need to Modge Podge them today but come on, it was 2am, I was calling it a night.
I have a love/hate relationship with this project. It was a major pain in the hiney to fill these babies, I burned more than one of my fingers, I got sick and high (in a bad way) from smelling all of those darn heated glue sticks, and it kept me up half the night. That being said, the final result is so stinking COOL! I think my kids are going to flip over these! I went from cursing them all to H-E-double-hockey-sticks in the beginning of the night, to practically kissing them and whispering sweet nothings to them in the wee hours of the morning.

So I'd say give the project a try, as long as you go into it prepared. You could do so many cool things, fairy wands with pearlescent pastel paint would be so pretty! They're very sturdy, and surprisingly heavy, once finished so they should hold up to quite a lot of play.

Now excuse me while I go ice my finger pads and take a nap.

**Edit to add: I think I may have been a little too complainy in my post. While these were a pain in the butt to fill, the end result was totally worth it! The decorating was pretty fun too so if you're considering trying this one out go for it! Just have a stiff drink on hand to help get through the first part. ; )

Braided Spaghetti Bread

I had super high hopes for this recipe. One of my favorite restaurant meals is from a little family owned place, near where we lived when we were first married...Spaghetti Pie from Panino's. Yum! This Braided Spaghetti Bread reminded me of that and my mouth was watering just thinking about it.

First, let me say, do not plan this meal for an afternoon that you have errands to run and can't be around to babysit the thawing, rising dough like I did. Having never done anything with frozen bread dough before, I mistakenly thought that I'd only have to set it out on the counter to defrost and didn't realize there was more to it than that. Thankfully the 20 year old was around to help watch it and it all worked out with just a little bit of stress added to my day. (I'm feeling the need to apologize for the crappy cell phone pictures on these posts. It's all I have to use right now.)


The assembling part was pretty easy, although I'd recommend parchment paper. It wasn't the easiest getting the assembled braid moved from the counter to the baking sheet. Please forgive my messy braid, I was working quickly as I had to be out the door in 5 minutes to pick up a Craigslist purchase (again, better not to plan this one when you have running around to do) so I kind of just threw it together.


Now, I've said this before, but I sometimes wonder if my children were really birthed by me. Pasta, especially spaghetti, is one of my favorite things in the world. I chose spaghetti for my birthday dinner for about 15 years in a row. I always wanted mashed potatoes as a side dish but my mom always said no. I think they'd go great together!

But anyway, my 2 older boys do not care for pasta (except in mac and cheese) and really don't care for spaghetti. Craziness I tell ya! But the 5 year old said "Mmmm" about his and ate it without too much prodding. The 9 year old said it was "better than regular spaghetti" but still needed a lot of "Eat your dinner!"'s to finish it. My fellow pasta fan, the 20 year old loved it and had two helpings. I thought it was decent. Not quite the BEST MEAL EVER that I was hoping for, but pretty good. It was a bit too doughy or bready for me. I'd probably have some extra sauce for dipping next time and add more cheese. One can never have too much cheese.

We may make this again, if only because I now have 4
more frozen loafs of bread dough in my freezer to use up, but I don't think it will become a staple in our house.

Tuesday, December 6, 2011

Lace a Paper Plate Snowman

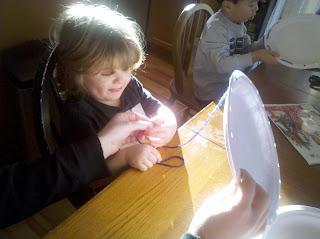
The craft I chose for today was to lace a paper plate snowman . I started out intending to do this one just as the directions stated but my hole punch had different plans. The spring on it was broken so I would have to pry it open after each and every punch and, well, after doing 4 plates, I just wasn't into doing 4 more so I modified the project.

We turned our lacing plates into frames for cotton ball snowmen. Each kid got a plate and some yarn and laced the edges. The two 3 year olds (our neighbor boy was over too) liked doing the lacing but needed help or they'd get mixed up. They did enjoy saying "Up....down....up....down...." while trying to keep with the pattern though.
(See his little tongue sticking out while he concentrates?? Too cute!!)

The 5 year old did better independently, but his ended up being laced around the edges which he deemed "better" so he kept them that way.

After the plates were all laced up, we added cotton ball snowmen. The 20 year old, who loves all things craft, decided to join in at this point and got super creative with pipe cleaner scarves, hats and trees and tooth pick arms. The toddlers enjoyed picking out what to add to their snowmen (my 3 year old insisted on a "Santa hat!") and the 5 and 9 year old really got into making their scene complete.
Not sure if we'll do this project again next year, but all in all, a fun way to spend some time this afternoon.